

Now, let me start out by saying that these patterns haven't been tested beyond the people I have in my family (My daughter is the size of a 7/8 year old and my son is 2), so if you get an end result that doesn't match up to what has been written here or you find a mistake, then please let me know! :) You can either comment below or send me an email. I love hearing from people reading this blog and using my patterns, so please feel free to write me or even send me pictures. I might even post those pictures on the blog (with your permission of course).
So, lets get this show on the road! I didn't make PDF files of these three this time, but I'm sure you can download the file from the women's pattern and jot down some notes. Let's start with the men's pattern.
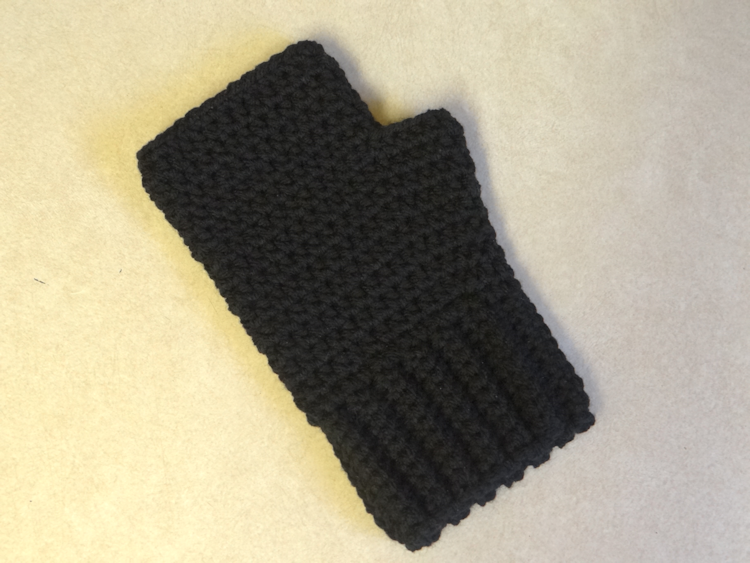
Just like the women's pattern, I used a worsted weight acrylic yarn and an H hook. the gauge ended up being about 16 hdc to equal 4 inches.
Men's Simple Fingerless Gloves
fits adult males
These patterns are worked continuously, making it easy to follow. It's just one simple pattern for both hands, so they are interchangeable! Make two.
Cuff
Ch 11
Rnd 1: sc in second ch from hook and in ch across, turn (10 sts)
Rnd 2: ch 1, sc in first sc, sc in back loops only of next 8 sc, sc in last sc, turn (10 sts)
Rnd 3-28: repeat rnd 2 (10 sts)
Slst or sc the two ends together to form a cuff. Begin the next round by crocheting along the edge of the cuff to start the hand portion of the glove.
Hand
Work in the round, joining at the end of every row and continuing in the same direction. The first stitch will always be in the same stitch as the join from the previous round.
Rnd 1: ch 1, sc 29 times along the edge, join to first sc (29 sts)
Rnd 2: ch 1, 2 hdc in first sc, hdc in each sc across, join to first hdc (30 sts)
Rnd 3: ch 1, hdc in each st around, join (30 sts)
Rnd 4: ch1, 2 hdc in first st, hdc in next 2 st, 2 hdc in next st, hdc in each st around, join (32 sts)
Rnd 5: ch 1, hdc in each st around, join (32 sts)
Rnd 6: ch 1, 2 hdc in first st, hdc in next 4 sts, 2 hdc in next st, hdc in each st around, join (34 sts)
Rnd 7: ch 1, hdc in each st around, join (34 sts)
Rnd 8: ch 1, 2 hdc in first st, hdc in next 7 sts, 2 hdc in next st, hdc in each st around, join (36 sts)
Rnd 9: ch 1, 2 hdc in first st, hdc in next 9 sts, 2 hdc in next st, hdc in each st around, join (38 sts)
Rnd 10: ch 1, hdc in first st, skip next 11 sts, hdc in next st and each st around, join
Rnd 11-14: ch1, hdc around, join
Rnd 15: ch 1, sc around, join
Fasten Off and weave in end.
Kids Simple Fingerless Gloves
should fit ages 5-12

Cuff
Ch 9
Rnd 1: sc in second ch from hook and in ch across, turn (8 sts)
Rnd 2: ch 1, sc in first sc, sc in back loops only of next 6 sc, sc in last sc, turn (8 sts)
Rnd 3-20: repeat rnd 2 (8 sts)
Slst or sc the two ends together to form a cuff. Begin the next round by crocheting along the edge of the cuff to start the hand portion of the glove.
Hand
Work in the round, joining at the end of every row and continuing in the same direction. The first stitch will always be in the same stitch as the join from the previous round.
Rnd 1: ch 1, sc 21 times along the edge, join to first sc (21 sts)
Rnd 2: ch 1, 2 hdc in first sc, hdc in each sc across, join to first hdc (22 sts)
Rnd 3: ch 1, hdc in each st around, join (22 sts)
Rnd 4: ch1, 2 hdc in first st, hdc in next 2 st, 2 hdc in next st, hdc in each st around, join (24 sts)
Rnd 5: ch 1, hdc in each st around, join (24 sts)
Rnd 6: ch 1, 2 hdc in first st, hdc in next 4 sts, 2 hdc in next st, hdc in each st around, join (26 sts)
Rnd 7: ch 1, hdc in first st, skip next 6 sts, hdc in next st and each st around, join (20 sts)
Rnd 8-10: ch1, hdc around, join
Rnd 11: ch 1, sc around, join
Fasten Off and weave in end.
Toddler Simple Fingerless Gloves
should fit ages 2-4

Now these munchkins tend to have short chunky hands, so this one is worked a little differently, which is why I decided to post it last in the lineup. :)
Cuff
Ch 7
Rnd 1: sc in second ch from hook and in ch across, turn (6 sts)
Rnd 2: ch 1, sc in first sc, sc in back loops only of next 4 sc, sc in last sc, turn (6 sts)
Rnd 3-24: repeat rnd 2 (6 sts)
Slst or sc the two ends together to form a cuff. Begin the next round by crocheting along the edge of the cuff to start the hand portion of the glove.
Hand
Work in the round, joining at the end of every row and continuing in the same direction. The first stitch will always be in the same stitch as the join from the previous round.
Rnd 1: ch 1, sc 25 times along the edge, join to first sc (25 sts)
Rnd 2: ch1, 2 hdc in first st, hdc in next 2 st, 2 hdc in next st, hdc in each st around, join (27 sts)
Rnd 3: ch 1, 2 hdc in first st, hdc in next 4 sts, 2 hdc in next st, hdc in each st around, join (29 sts)
Rnd 4: ch 1, hdc in each st around, join (29 sts)
Rnd 5: ch 1, hdc in first st, skip next 6 sts, hdc in next st and each st around, join (23 sts)
Rnd 6-7: ch1, hdc around, join
Rnd 8: ch 1, sc around, join
Fasten Off and weave in end.
ALL DONE! ENJOY YOUR SIMPLE FINGERLESS GLOVES FOR THE ENTIRE FAMILY!
Don't forget that you can find the Women's Simple Fingerless Gloves here.
I really hope you enjoy this pattern. If you need any help then please feel free to leave a comment or email me at twolittlecs@gmail.com.
Happy crocheting!
TERMS :: You may sell whatever you make with my pattern, but please link back to my blog. Please DO NOT alter my pattern and repost it in any way, claiming it as your own.
Happy crocheting!
Chassity O.
Thanks for sharing these patterns.. I am trying a toodler glove right now :) I noticed that in the toddlers glove pattern in the second row you have written 8 sc in back loops and I guess that should be 4 sc in the back loop to make it total of 6 sc in each row and same in the kids gloves, I think it should 6 sc in back loops... please confirm
ReplyDeleteYes, you are right! Thanks so much for pointing that out to me! That will be fixed now! :)
DeleteThank you for sharing this! Love it :)
ReplyDeleteThanks for the pattern, have made a load of toddler gloves for my friends. They love them because it makes it much less likely that they pull them off!
ReplyDeleteI have made several pairs for gifts. Everyone was very pleased and excited about their gifts! Thank you for the patterns!!
ReplyDeleteI'll be making some of the gloves soon. Thank you for the pattern
ReplyDeletefor the kids glove 5-12 is it am H hook if it is then I tried that and it fitted my 4 year old let me know I used I love this yarn sparkle
ReplyDeleteYes I did use an H hook for all these patterns. If this pattern doesn't fit your child then you are more than welcome to use the Women's pattern. These are meant as guidelines and not necessarily going to fit every single person. Please make sure you are using the right weight of yarn (not all yarn is created equal, LOL) and that your gauge matches the gauge I have mentioned above. You can always add rows in the cuffs, and subsequently adding stitches in the hand to get the perfect size. :) If you have any other questions please feel free to let me know or email me! :)
Deletewhere is the womens pattern?
ReplyDeleteThe Women's is in another post. It's linked above before the patterns start. :)
Deletegreat thingies for cold hands. Will make them from wool..!!!!
ReplyDeleteFingerless Gloves
Colors, colors, colors,I love it!!!
ReplyDeleteFingerless Gloves
this fingerless gloves size is very small try to Big size pattern....!!
ReplyDeleteFingerless Gloves
Are you having a hard time understanding what you mean. Do you need help with the pattern?
DeleteI found that they worked up small I went up a couple of hook sizes and that worked for me so using a 6mm rather then a 5mm if that helps... beautiful gloves thank you for the pattern
DeleteThanks for your input. Doing a gauge swatch may also help!
DeleteAt the beginning of round 2 of the glove I started with 25. At the end of that round you say it should be 27, but I have 32. There are 7 increases, so how can it be 27 stitches? Am I interpreting this wrong?
ReplyDeleteIt looks like you are talking about the toddler size? In round two you do not increase 7 times, you are only increasing two times. You work the increase in the first stitch, then hadc in the next, hdc in the next, then an increase in the next (this would be the 4th stitch in the row), then you are just going to put hdc's in all the rest of the stitches in the row. The increases will all be worked on that side of the glove to make room for the thumb. I hope that helps! :)
DeleteI wanted to let you know that after searching hundreds of patterns I have found yours to best suit my toddler's ninja turtle Halloween costume (he is autistic and will only tolerate crocheted costumes) I am adding a few rows to make a thumb and two fingers like the turtles have and will be adding the color band to the cuff so my little guy won't complain about another fabric on it... will update with pics when I am done! Thank you for this pattern!
ReplyDeleteI'm a little confused. When working the hand section.....is the slip stitch join counted as a stitch? Im not understanding where my first stitch of the round is supposed to go. In the join? If so, then the previous round I am supposed to have slip stitched join BEFORE the place where i will be joining in the next round? In other words....the joins are not gonna line up? Instead will be going at a diagonal?
ReplyDeleteThanks for your comment! The slip stitch is NOT counted as a stitch. Your first stitch in each row will go where you slip stitched. I never count the slst/join as a stitch, so my patterns are never written as such. Thanks so much for asking! :D
DeleteWonderfully quick and easy! Thank you for the pattern. :-)
ReplyDeleteThank you so much for these patterns. I'm a guy who's just started crochet and I've been dying to find simple guy things to crochet. These gloves are perfect and I sat today and finished a pair whilst watching a film. These are definitely my new favourite thing to crochet and I'll be making lots for Christmas gifts. Thank you thank you thank you :)
ReplyDeleteAwesome! Thanks for stopping by!
DeleteI made some as early Christmas presents for a friend's kiddos and she loves them! I used an I hook though, so when making the toddler gloves for my own son, I had to knock out a few rows on the cuff. I did 20 instead of 24 and it worked out great! Thanks!
ReplyDeleteMittens are warmer than gloves made of the same material because fingers maintain their warmth better when they are in contact with each other.
ReplyDeleteknitted Fingerless Gloves
That's good to know! I don't really use fingerless gloves in colder weather where gloves or mittens would be better served, I mostly use them for fashion in cool climates and to have easier access to my cell. ;)
DeleteThese are so cute! I am working on the toddler size and I"m suck after the cuff. It's not your directions it's just that I am new to this kind! But after I do the cuff I"m not sure how to join it or where? I know how to make slip stitches but do I just go down the side and put them in the turning chains and then back up again to start the glove portion?? Thanks for any help, I am so excited to make these for my family!!
ReplyDeleteI think I figured it out! I join down the side and I will start the glove portion on what is the foundation chain?? :) !!
ReplyDeleteThe piece you crocheted should be long enough to go around your wrist so that should give you an idea of how it's worked. You want to slip stitch the first row you made to the last row you just crocheted so that it makes a continuous loop around your wrist. You'll then crochet on the side of the crochet work to make the hand. I hope that made better sense. :)
DeleteHow can I make these for infant size?
ReplyDeleteYou might be able to make these for an infant if you follow the toddler size and use less rounds in the cuff. Using less rounds in the cuff will then make it not as wide and then make the hand smaller. You can adjust the hand instructions similarly by watching the thumb pattern. You may not need to do as many rows with the thumb so that they can have a smaller opening. Then just continue on with the hand until the rows reach their knuckles. It's best if you have a baby there to test it on. :)
DeleteWould the men's size fit a guy who wears 2x gloves?
ReplyDeleteIt's hard to say because I think it all depends on how tight you crochet and what type of yarn you use. I'm gonna guess NO just to be safe. Maybe use a larger hook to get a larger size or add a few rounds for the cuff to get a larger size. If you choose to add a few rounds then however many rounds you do, you'll single crochet one more stitch then there are rounds for the hand and follow the rest of the directions as normal. :)
DeleteI used the same hook and worsted. I just add 10 more to what was called for.
DeleteHelp. How is the thumb section worked? I got the rounds, but how is that worked?
ReplyDeleteI'm sorry I'm late to your comment. I'm not sure I completely understand your question? If you still need help, could I get some more details? If you'd like to email me, it's the best way to reach me. Thanks so much!
Deletetwolittlecs@gmail.com
DeleteThank you for sharing this pattern. I had to add 10 so that it would fit my dad's hands but it's so easy. I love it. It's very quick too.
ReplyDeleteThanks so much for your comments and your help! The ease of this pattern is what is so great and can be altered easily for bigger and smaller sizes! Thanks for helping other commenters as well!
Deleteشكرا جزيلا
ReplyDelete