Showing posts with label Craft Project. Show all posts

Pinterest Project :: Phone Number Bracelets


So I saw this photo on Pinterest and knew that I just HAD to make one for my daughter.  It linked to the cute little blog called The Good Stuff Guide.  In the description is says it's good for using when you're traveling or going through the airport, just in case your child ever gets separated from you.  This way authorities can call you.  Now I immediately thought that this was a great thing for my daughter.  She's 5 years old now and often goes to the playground across the street and to her friends' houses (all with my permission first).  I thought this would be a great idea for the parents of her friends to be able to contact me if need be!

Here's what you need:
• number beads
• elastic thread
• decorative beads of choice (I got some brightly colored flower beads and some matching seed beads)


So, what I did is leave the elastic on the spool and just string all the beads on there as is.  Start with your phone number first and then the decorative beads next.  It's a good idea to put spacers in there so it's easy to read.  You can wrap it around your child's wrist every now and then to see if you've made it long enough to fit or what you might need to adjust.  Here is what my finished bracelet looked like, though I did blur out my number.


This was such a quick and cute project, but you have to be careful how you use this.  If you are worried about your number getting into the hands of people you may not want to have it then you will need to rethink about how you use the bracelet.  We luckily live on a military installation and I'm not extremely worried about my daughter wearing it to the park.  :)

I just love finding things all the time on Pinterest and I hope I can bring more Pinterest Projects your way.  Feel free to follow my Pinterest boards to see all the cool things I pin, and more!  :)

Great Free Printable Valentine's

I am so excited to create some super cute valentine's for my daughter's first year in school so I decided to go searching the web for great crafty ideas!  Man was I not prepared for what I was about to find, there are so many great printables out there, so I decided to share what I found here!

Living Locurto has this super adorable iPhone printable.

She also has these Rock! Valentines and Candy Kiss Bag Toppers which are great for boys.

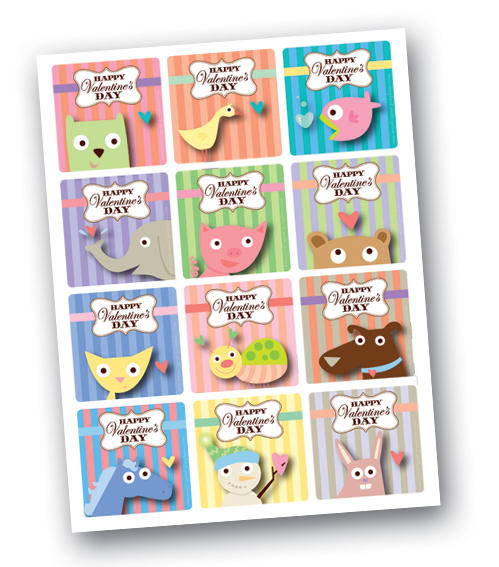
There also happens to be these Cute Animal Valentine's by Secret Agent Josephine that I find super adorable and perfect for preschoolers.

I thought these free printables were cute by Amy IS The Party.  I love those kitchy sayings!

For a simple but super cute look, Be Mine Freebie by The Rubber Punkin is the right choice. I absolutely would love these as tags to some homemade cookies for adult friends.

For that special man in your life, go with this Chocolate Bar Wrapper by Jeanne Winters.

I absolutely think these Bee Mine Lollipop Tags will be all the buzz, and even their chapstick counterparts would be a hit.

I even think I might do this non-candy treat for my daughter! Homemade crayons attached to a card that reads "Happy Valentine's Day, for 'crayon' out loud!" Get it? "Cryin" out loud? LOL

So, what are you going to be doing for your kids and/or loved ones this Valentine's Day?

First Day of School

So my daughter, Cecilia aka CiCi, has started preschool.  I totally would have posted this earlier, but you know I had all that computer trouble around the same time! :(

So a little back story, I grew up in Germany.  My mother is full German and I spent my first 9 years or so in Germany.  Over there they have this awesome tradition for children and their first day of school.  It's called a Schultute!  Basically it's a decorated cone that's filled with candy and goodies so that they feel better about going to their first day of school, which can be filled with anxiety.


I absolutely love this tradition and had to do it for my own daughter, even though she was super excited about going to school! :)  I found this cute blog post with cute instructions on how to do it, but I'm also going to show you what I did!

What You'll Need:
• Poster Board
• Wrapping Paper or other decorations
• Scissors
• Hot Glue and/or good glue stick
• Tissue Paper or Fabric
• String
• Fillers (like candy, school supplies, etc.)


First you'll need to cut your poster board so that it can become a cone.  How large you want it is up to you, but I made mine pretty large because I had some big items.  Place your poster vertically in front of you to measure it out. To get the rounded edge I used a string and a pencil.  I held one end of the string in my right hand with a pencil and placed it at the bottom right hand corner you see in the photo. I pulled the other end of the string out to the bottom left hand corner of the poster in the photo.  Holding the string tight, I keep the left hand in the corner and draw my pencil up and around to the upper left side of the poster, like in the photo.  Then cute along this line to get the final product.


I then used my poster to trace my wrapping paper and cut it out as well.  Using a glue stick or hot glue, glue the wrapping paper down to the poster.


Use your hot glue to glue the two long edges together.  You might need some extra hands or a clip to help hold it in place while you glue.  Make sure it's holding together really well because you don't want it to come apart when you put your goodies inside.


Glue your tissue paper or fabric to the top.  To make sure it goes all around nicely, you'll want to overlap it and bunch it up.  This makes it easy for the kids to open and get inside, as well as not ripping any tissue paper used.  

You could take the decorating one step further and put ribbon around the top edge, maybe make the cone look like your child's favorite character, or put their name on it with pretty craft letters.  The possibilities are endless.  Next year I really want to make another one for my daughter and then I will probably make it into a character.


So, now you fill it with goodies.  I filled mine with lots of candy, as well as a coloring book, stickers, number magnets, number flash cards, light up bracelets, and hair-ties.  Traditionally it's filled with all candy, but you can fill it with whatever you like, even all school supplies.


My daughter loved it.  (Sorry for the blurry pic, but I had a hard time getting my daughter to be still, LOL!)

So, hopefully you can use this, but I'm sure many kids already started school, so maybe next year?  I plan on making one of these for my daughter for a few more years, though they will be smaller and smaller, hehe!  I hope you like this post! ;)


No Creativity

I haven't been feeling very creative as of late, I've seemed to have lost some Mojo. I mean, I have been working on my new crochet portrait piece, but other than that I can't seem to find the drive to work on anything else. I have been getting lots of ideas though, so that I suppose is sorta a good thing. Now I just need to find a way to make it come to life. The process is kinda hard. I honestly think I need some more inspiration, so I've blog hopping around to some of my fave creative blogs.


Not So Idle Hands created a wonderful little baby shower gift of a hand "screen-printed" onsie and baby leg warner set. I really want to try this for my little one some time.


Make It & Love It has some AWESOME crafty ideas that I wanna try. I really wanna try these 5 Stranded Braided Headbands really soon. It should be awesome.


And of course I have to link my new found obsession, crochet portrait pieces, by TotalLee!